To Upload Files to Google Cloud Storage, you can follow the following steps.
1. Create a Service Account
- In your Google Cloud Console, head over to the Service Accounts Section.
- Select your project and Create a Service Account.
- Once the Service account is created, you will be assigned a random email address for your service account
- The next step is to create a Key which you will use in our Laravel Application.
- In the keys tab in your newly created service account, click on the add key button and choose the JSON option
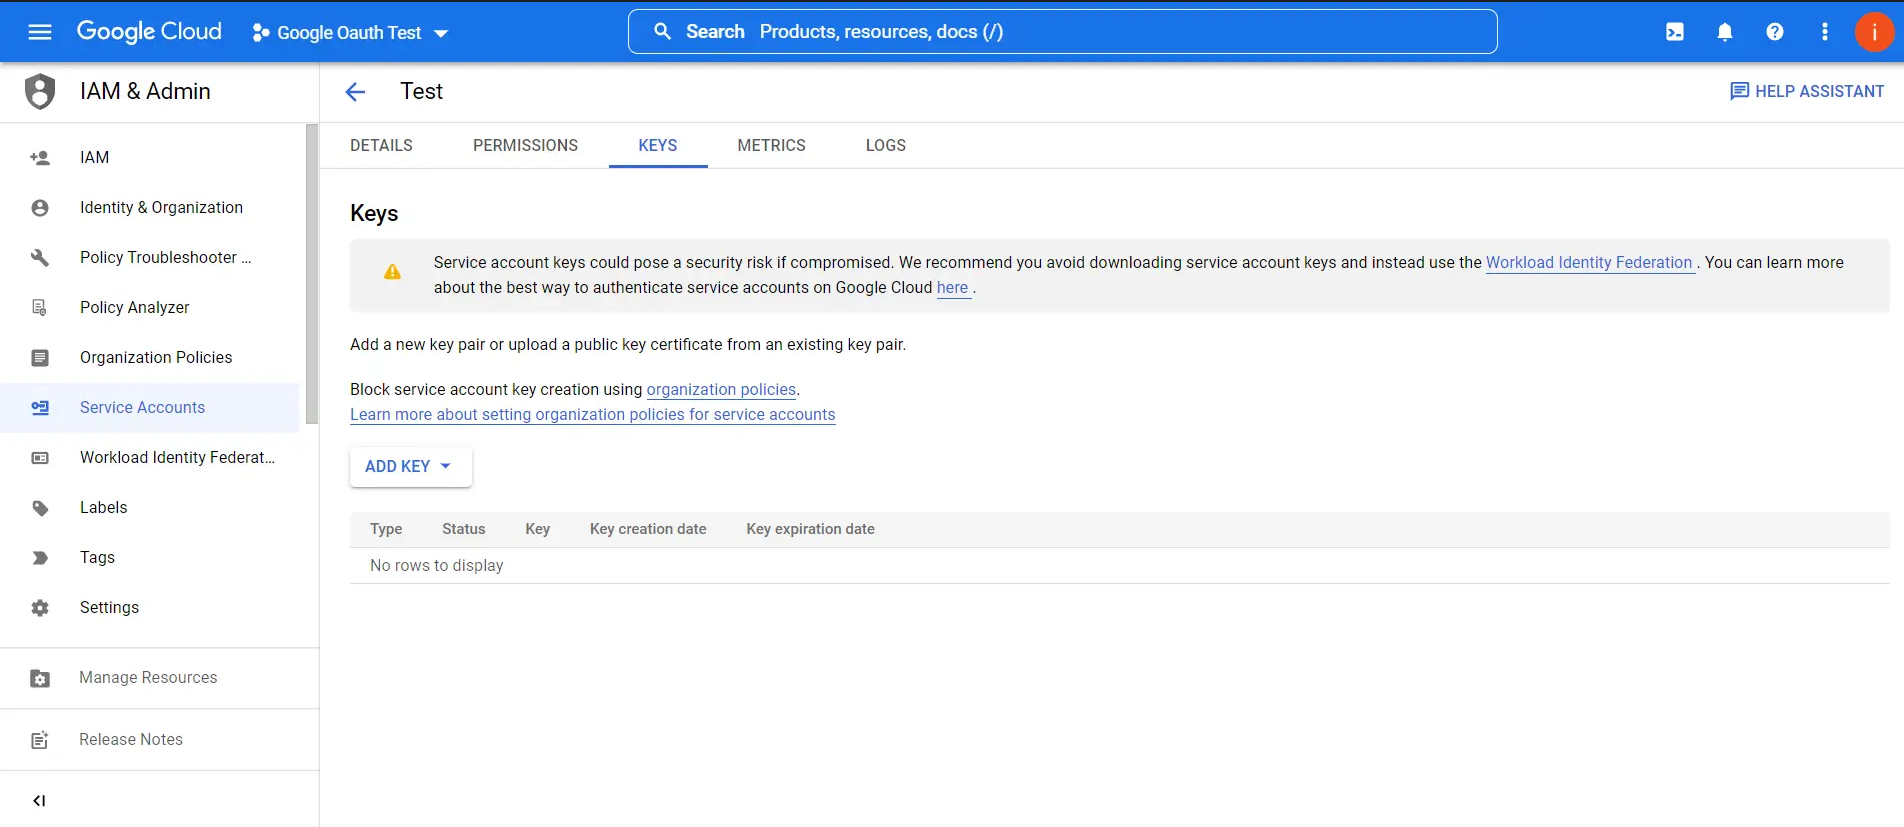
This will create a new key with its corresponding service account JSON file which you can download to your local pc.
2. Create a Storage Bucket
Once you are done with setting up the Service Account, it is now time to create a Storage Bucket. A bucket is a basic container which holds all your data. You can have folders and files in a single Bucket.
- Head over to the Cloud Storage Tab and create a new Bucket
- Name your bucket and choose the location where your bucket will be created. In this part, I will just choose a single region as it is the cheapest
- For the default storage class, just choose the Standard class, or any other class depending on your needs
- The last step is to choose the protection tools. You can leave it as None since Google Cloud Storage Buckets are Secure by default. Once done click Create and your bucket is now ready.
- One final thing you need to do is to grant your service account access to your bucket and specify its roles. Click on your new bucket and head to the permissions tab.
- Click on grant access and Add your Service Account as a Principal(search for it and it should pop up in the search).
- You then need to assign cloud storage roles to your principal. The Roles you should assign are Storage Admin, Storage Object Admin, Storage Object Creator, and Storage Object Viewer. Click save and your bucket is now ready to be used in Laravel.

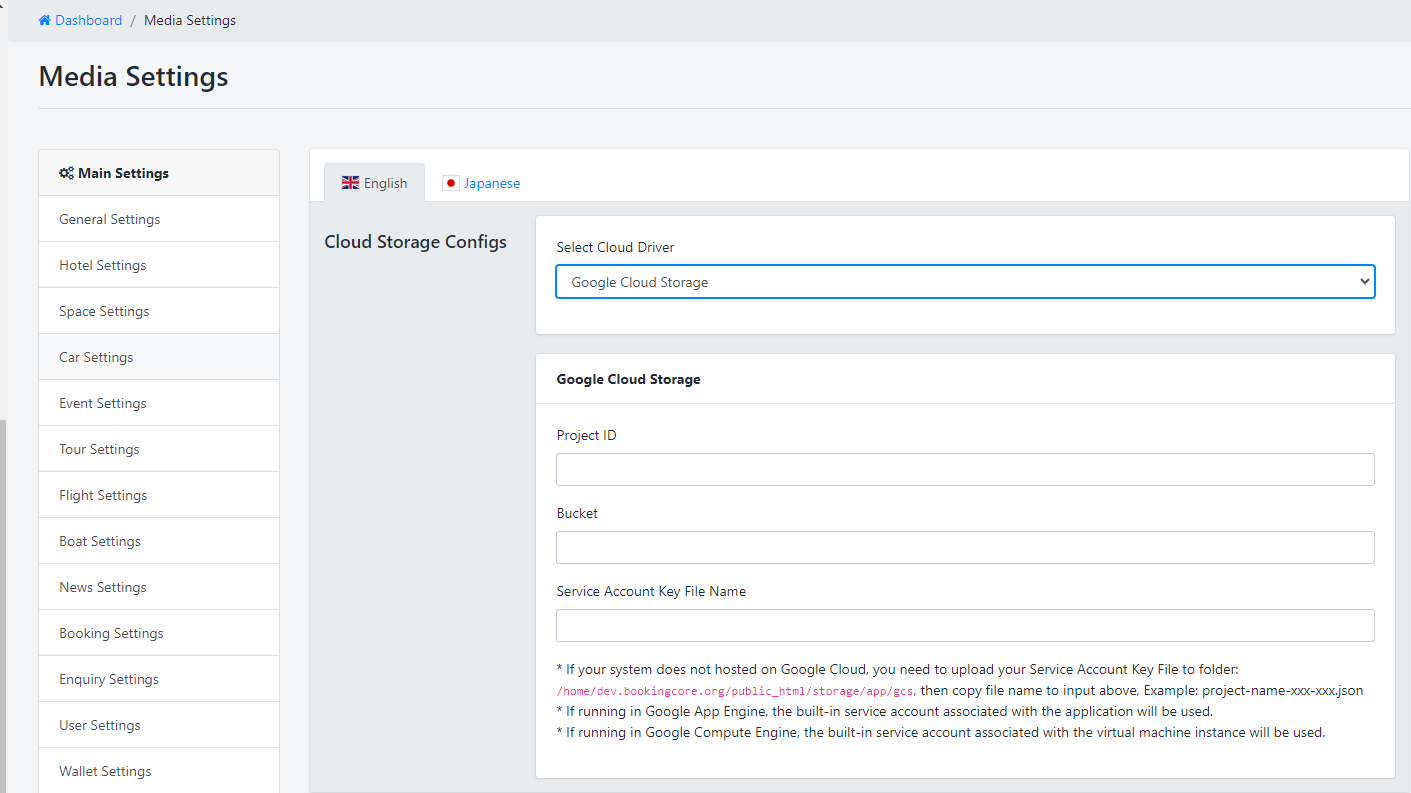
3. Input your key to Media settings: