Create a New Event
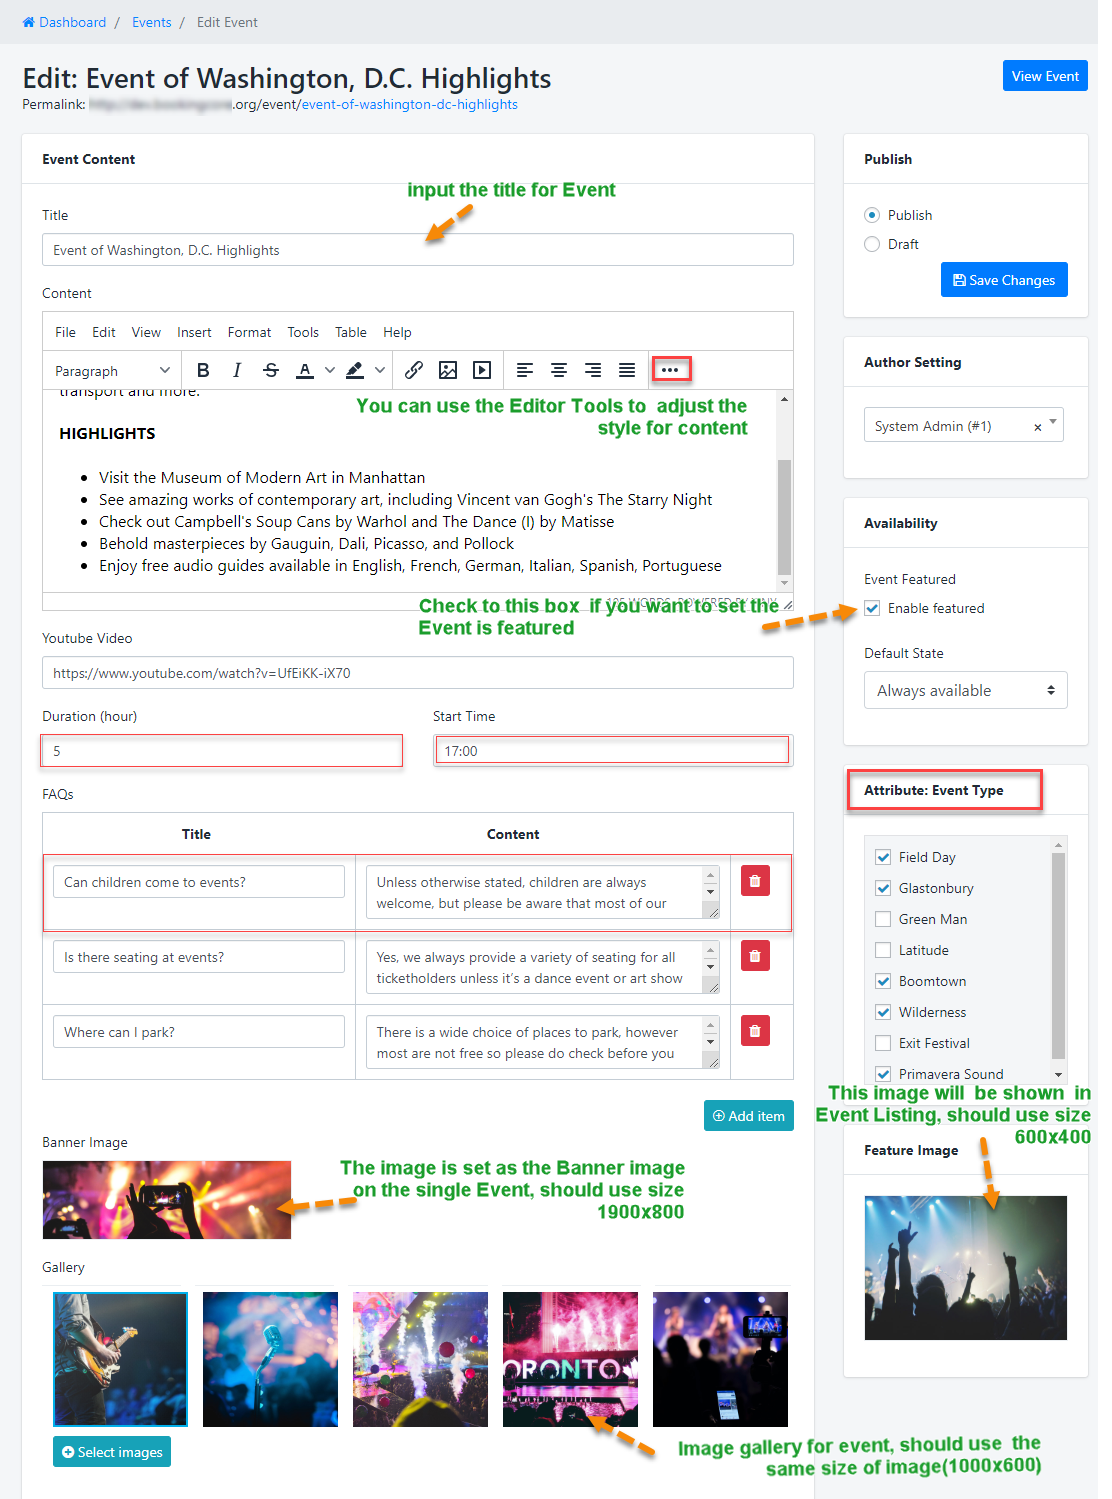
Navigate to Dashboard > Event > Add Event, then Add some information like Name, event Content, Descriptions, Attribute for the event...
- Title : Use a good name for the event will help Google find you easier
- Content : write a detailed description about the event
- Attribute : Select Event attribute will help client Filter it easier
- Youtube Video : On this version, we only support youtube video, you should upload the good quality video to show it on Single current event banner
- Duration: the number is calculated by Hour
- Start Time: input the start time for the event
- FAQ's (Optional): Enter commonly asked questions from customers

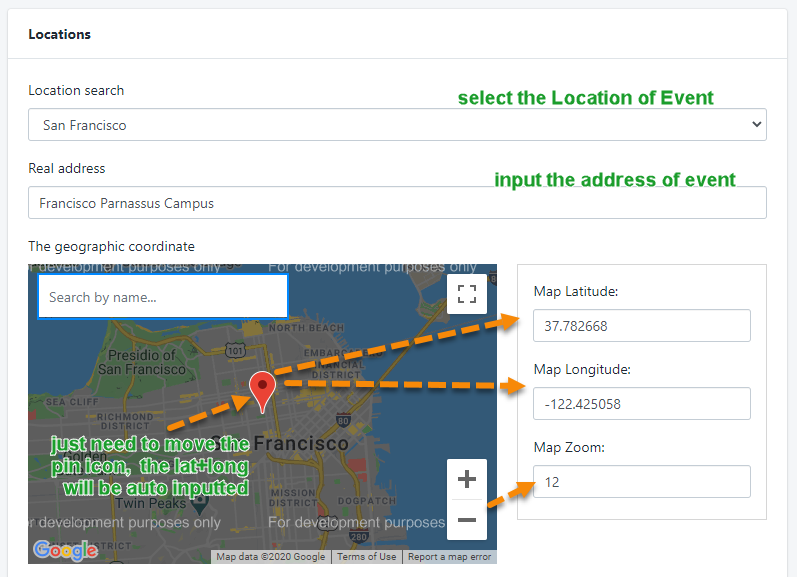
Event Location
- Location : Select the location for the event, Create more Location
- Real event address: enter the address for the event
- Map Engine : just need to mark the point of Location in the Map, the Long&Lat information will be generated, Zoom default is 12

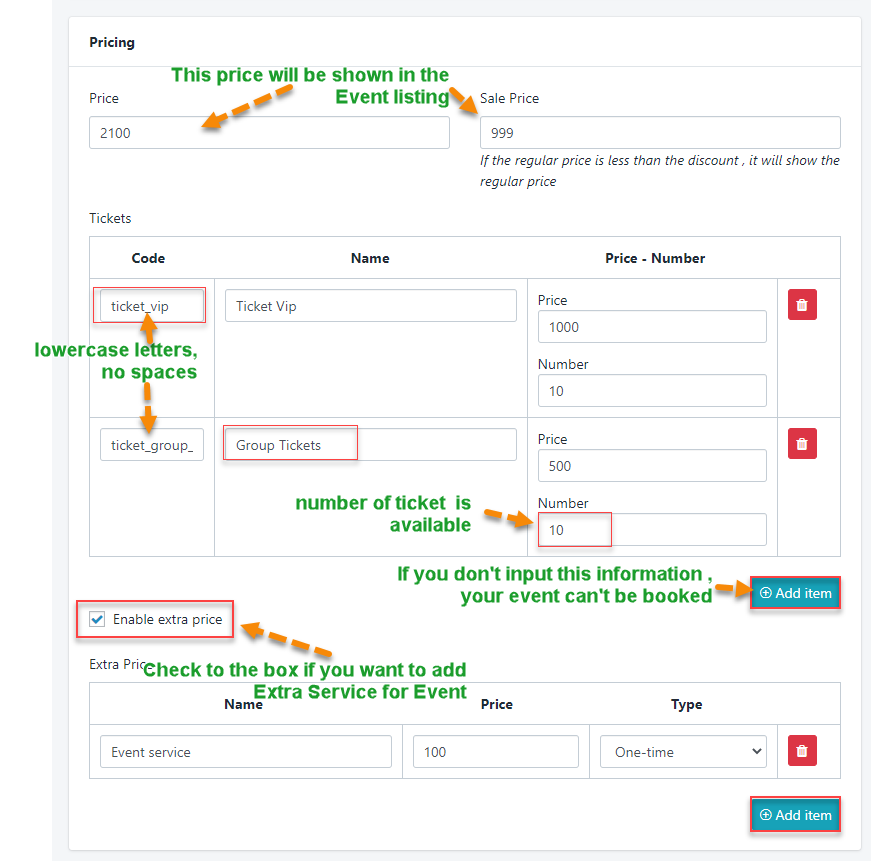
Pricing for event
Fixed Price: input information to show the price on the List
- By default, the event price will be calculated according to the price by Ticket.
Price by Type of Ticket: if you don't create any ticket type => your customer cant do booking
When you enable this option, all prices will only be calculated according to the price you offer for each object

Extra service(Optional): you can add more service for your event like: FastFood, Drinks..
you can follow these steps below:
- Step 1: Check to the box to Enable Extra Price
- * But you need to REMEMBER: If you Enable it but you don't input anything, your event booking will be FAILED
- Step 2: Enter the title of Extra service
- Step 3: Enter the price of service
- Step 4: Select Type of service: price per One time or price per Hour

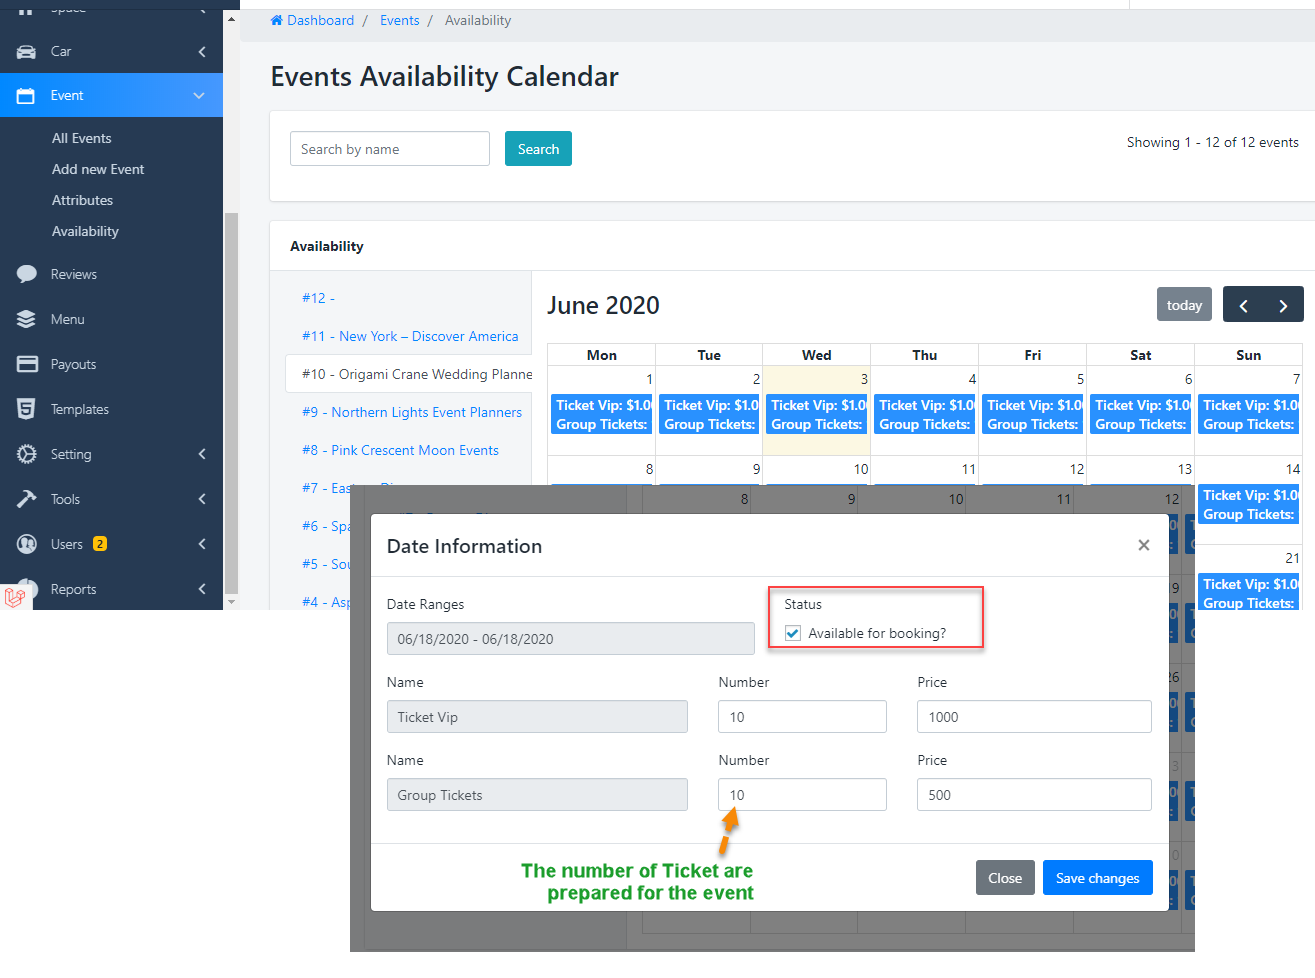
3. Availability calendar for event
Navigate to Dashboard > Event > Availability: Add price by type of Person
Remember the Max Guest: if you leave it blank, Your client can't book on that day

SEO Manage:
If you don't need SEO on site, just need to select No in the selector below:


