Razorpay payment gateway for My Travel

Need another version of this template?
What is included
This is an Add-on for My Travel Script
Installation
Copy folder Payment Razorpay to folder mytravel/Plugins/
Setup
Go to My Travel Dashboard -> Payment Settings -> Razorpay and enter the API Credential

How to Add Indian Payment Gateway in MyTravel
To add Indian Payment Gateway in MyTravel you will need a Payment Gateway, in which you can make payments. So for that, we are going to use RazorPay Payment Gateway for MyTravel.
It uses a seamless integration, allowing the customer to pay on your website without being redirected away. This allows for works across all browsers and is compatible with the latest MyTravel.
To add RazorPay Payment Gateway to your website, you need to install the plugin.
Firstly go to the /mytravel/plugins/ directory in the folder code.
Then copy the Razor payment gateway plugin to the folder and extract the file there
How to set up Razorpay plugin
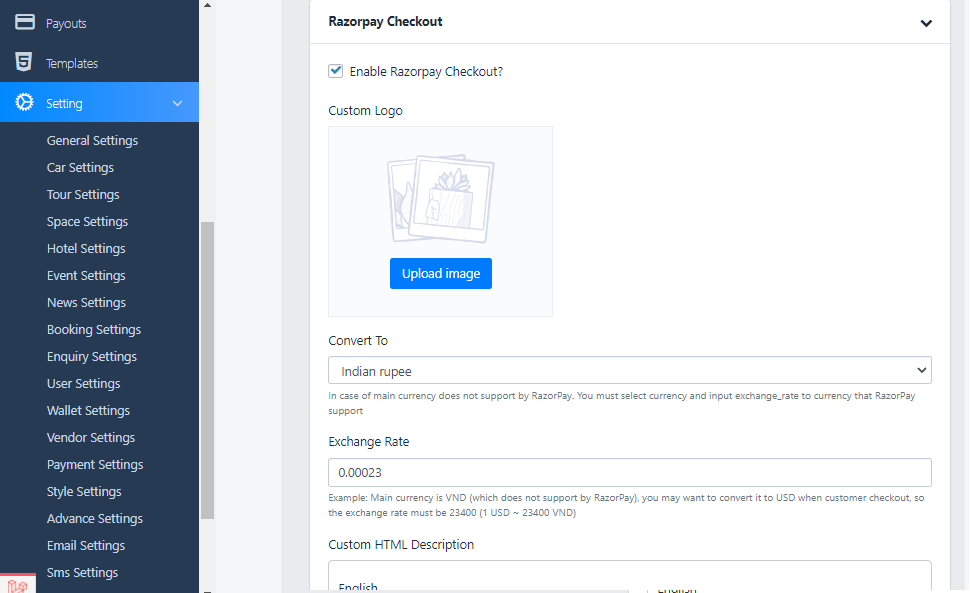
Now after installing the plugin, it’s time to set up the Razorpay Plugin, and for that go to
Dashboard > Settings > Payment settings as shown in the screenshot below:
Ready to build with this product?
Preview the item, review the included source files, and purchase when it fits your project.
Where should we send updates?
We will only use this for the requested product version or custom build follow-up.
Missing something?
Tell us the feature, page, or integration you expected to see.
What stopped you from buying?
One quick click helps us improve.